Squad Composition Decision Guide
Best Squad & Team Compositions in STAR WARS Zero Company
There Is No One Squad for Every Mission
The strongest squad is the one that covers the jobs your current mission needs without creating a single point of failure.
Pick what the squad has to do, read why a composition covers that job, then load it into the Squad Builder and swap operators yourself.
A squad is 4 operators. Every composition on this page is built and analysed at that size.
01
What do you need this squad to do?
Pick the job, not the operator. Each answer below is derived from the same capability readings the Squad Builder uses.
Balanced
Cover every tracked job without leaning on one operator for all of it.
- HawksSetupDC-15A
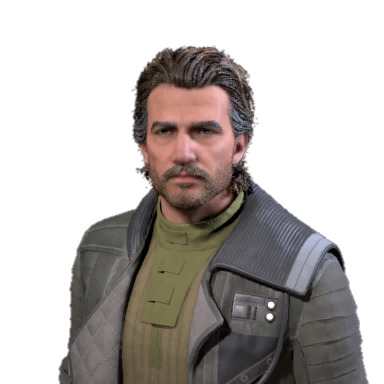
- Jae MordantDamageRelby-v10
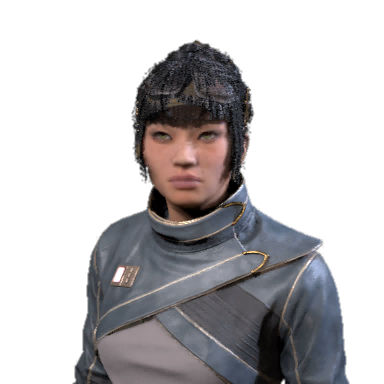
- BR-1Control / FrontlineNo resolved weapon kit
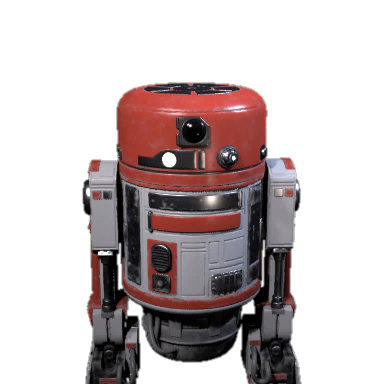
- Luco BroncSupport / FlexIQA-11
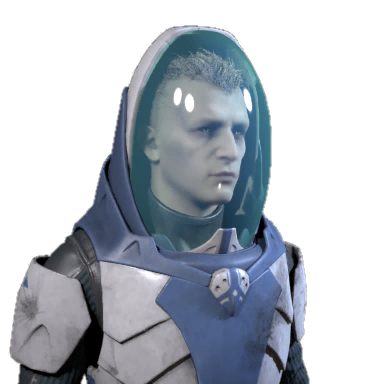
Coverage
- ✓ Ranged Pressure3 of 4
- ✓ Close Combat2 of 4
- ✓ Mobility3 of 4
- ✓ Control2 of 4
- ✓ Support3 of 4
- ✓ Sustain1 of 4
- ✓ Overwatch3 of 4
- ✓ Anti-Droid1 of 4
- ✓ Area Damage2 of 4
Range
- Close0 of 4
- Mid2 of 4
- Long1 of 4
Bond links
Hawks ↔ Jae Mordant · Hawks ↔ Luco Bronc
Why this works: Covers 9 of 9 tracked capabilities: Ranged Pressure, Close Combat, Mobility, Control, Support, Sustain, Overwatch, Anti-Droid, Area Damage.
Weakness: Nothing is uncovered, but Sustain rests on BR-1 alone and Anti-Droid rests on Luco Bronc alone. That is the slot an injury or a substitution would cost you.
3 of 4 operators can field a specialization whose ability text mentions Advantage: Hawks, Jae Mordant, Luco Bronc.
Sole source per slot
- Hawks: no reading is unique to them in this four
- Jae Mordant: no reading is unique to them in this four
- BR-1: Sustain
- Luco Bronc: Anti-Droid
If you have to substitute
- Setup → Cly Kullervo — Shares 5 of Hawks's tracked capabilities (Ranged Pressure, Close Combat, Mobility, Control, Overwatch).
- Damage → Kabb Uppercut — Shares 5 of Jae Mordant's tracked capabilities (Ranged Pressure, Mobility, Control, Support, Overwatch).
- Control / Frontline → Tel-Rea — Shares 1 of BR-1's tracked capability (Mobility).
- Support / Flex → Trick — Shares 2 of Luco Bronc's tracked capabilities (Ranged Pressure, Overwatch).
02
Recommended squad templates
One composition per goal, with the reasoning printed on the card. This is a template to start from, not a ranking of operators.
| Goal | Squad template | Core idea |
|---|---|---|
| HawksJae MordantBR-1Luco Bronc | Every tracked capability is covered by at least one operator. | |
| HawksJae MordantCly KullervoTrick | Maximise kill pressure: ranged damage, area tools and a second body that can finish a target. | |
| HawksJae MordantKabb UppercutBR-1 | Cover recovery and support first, then build the rest of the squad behind them. | |
| HawksJae MordantCly KullervoTrick⚠ Same four names as Maximum Damage — the readings do not separate the two questions. | Pair the operators who can field the specializations whose ability text generates Advantage with the ones who can spend it. | |
| HawksJae MordantCly KullervoKabb Uppercut | Cover the lane-denial tools first: control effects, Overwatch and area pressure. | |
| HawksJae MordantKabb UppercutLuco Bronc | Maximise ranged profiles and Overwatch coverage, including a dedicated long-range and anti-droid answer. | |
| HawksJae MordantCly KullervoTel-Rea | Maximise mobility and early pressure so the squad reaches the objective first and fights from it. | |
| HawksJae MordantKabb UppercutBR-1⚠ Same four names as Survival — the readings do not separate the two questions. | Cover recovery, protection and ranged standoff, and avoid plans that expose one operator. |
03
What makes a good Zero Company squad?
Four jobs, not four damage dealers. A slot is a job to cover — one operator can hold more than one of them.
Slot — setup
Setup
- Advantage
- Expose
- Debuff
- Positioning
Slot — damage
Damage
- Reliable kill
- Crit
- Burst
- Finisher
Slot — frontline
Control / Frontline
- Pressure
- Displacement
- Area denial
- Overwatch
Slot — support
Support / Flex
- Healing
- Protection
- AP support
- Objective support
The Advantage column is a specialization reading rather than an operator property: Advantage readings come from the specialization ability text, so any operator who can field these specializations can take part in the plan.
Specializations whose ability text mentions Advantage: Scout · Sharpshooter.
04
Best squad by campaign stage
Stage changes what is worth covering before it changes which four names appear. No unlock order is published in the data used here, so these are coverage priorities, not availability lists.
early game
Best Early Game Squad
- Cover the jobs you cannot skip while the squad has the fewest moving parts: ranged pressure, a recovery answer and one operator who can hold ground.
- Control and area tools are the first things to drop out of an early composition.
- The shape of your squad matters more here than the Bond links, because Bonds are still building.
- HawksSetupDC-15A
- Jae MordantDamageRelby-v10
- BR-1Control / FrontlineNo resolved weapon kit
- Luco BroncSupport / FlexIQA-11
- ✓ Sustain1 of 4
- ✓ Anti-Droid1 of 4
- Only thin and single-source rows are printed here.
How it plays: Holds a line, swaps between ranged and close pressure, and still has an answer when the fight drags on.
Weakness: Nothing is uncovered, but Sustain rests on BR-1 alone and Anti-Droid rests on Luco Bronc alone. That is the slot an injury or a substitution would cost you.
- Setup → Cly Kullervo: Shares 5 of Hawks's tracked capabilities (Ranged Pressure, Close Combat, Mobility, Control, Overwatch).
- Damage → Kabb Uppercut: Shares 5 of Jae Mordant's tracked capabilities (Ranged Pressure, Mobility, Control, Support, Overwatch).
- Control / Frontline → Tel-Rea: Shares 1 of BR-1's tracked capability (Mobility).
- Support / Flex → Trick: Shares 2 of Luco Bronc's tracked capabilities (Ranged Pressure, Overwatch).
mid game
Best Mid Game Squad
- Once more operators and specialization options are open, add control and deliberately overlap coverage.
- Two operators covering the same job survive an injury better than one.
- Bond links start changing which replacement is the cheapest one.
- HawksSetupDC-15A
- Jae MordantDamageRelby-v10
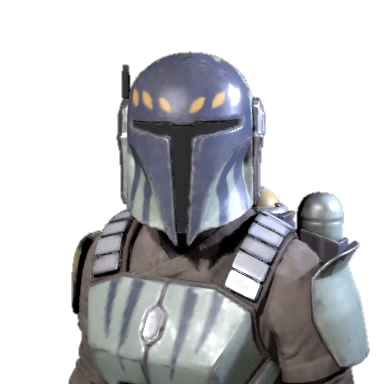
- Cly KullervoControl / FrontlineCly's Pistol
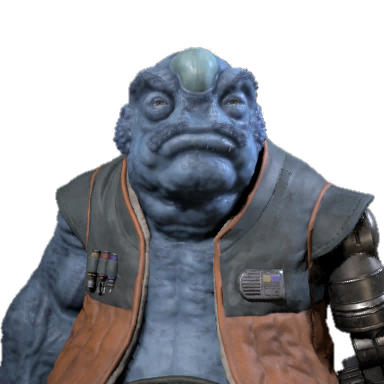
- Kabb UppercutSupport / FlexEE-3
- ⚠ Sustainthin
- ⚠ Anti-Droidthin
- Only thin and single-source rows are printed here.
How it plays: Pins lanes with Overwatch and control effects, then lets the remaining damage come from whoever is left standing.
Weakness: Left uncovered: Sustain, Anti-Droid.
- Setup → Tel-Rea: Shares 3 of Hawks's tracked capabilities (Close Combat, Mobility, Control).
- Damage → Trick: Shares 3 of Jae Mordant's tracked capabilities (Ranged Pressure, Overwatch, Area Damage).
- Control / Frontline → Luco Bronc: Shares 2 of Cly Kullervo's tracked capabilities (Ranged Pressure, Overwatch).
- Support / Flex → BR-1: Shares 2 of Kabb Uppercut's tracked capabilities (Mobility, Support).
late game
Best Late Game Squad
- With full ability kits and developed Bonds the squad can specialise hard and still cover every tracked job.
- This is the composition to compare against when you want to push one plan instead of staying flexible.
- Cross Training and utility slots are the last levers that close a remaining gap.
- HawksSetupDC-15A
- Jae MordantDamageRelby-v10
- Cly KullervoControl / FrontlineCly's Pistol
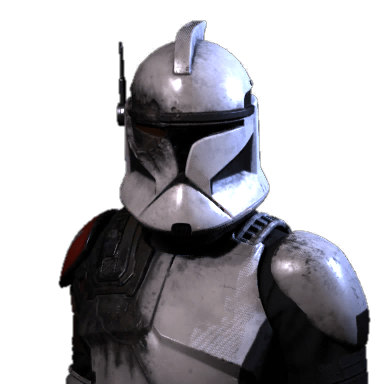
- TrickSupport / FlexDC-15LE
- ⚠ Sustainthin
- ⚠ Anti-Droidthin
- Only thin and single-source rows are printed here.
How it plays: Opens with ranged pressure, uses area tools on clusters, then pushes in once the target is softened.
Weakness: Left uncovered: Sustain, Anti-Droid.
- Setup → Kabb Uppercut: Shares 5 of Hawks's tracked capabilities (Ranged Pressure, Mobility, Control, Support, Overwatch).
- Damage → Tel-Rea: Shares 3 of Jae Mordant's tracked capabilities (Close Combat, Mobility, Control).
- Control / Frontline → Luco Bronc: Shares 2 of Cly Kullervo's tracked capabilities (Ranged Pressure, Overwatch).
- Support / Flex → Trick: No operator outside this composition shares a tracked capability with Trick.
05
Best squads by playstyle
The same roster, read through a different priority list. Where two playstyles resolve to the same four names, the card says so instead of inventing a difference.
Balanced
Cover every tracked job without leaning on one operator for all of it.
- HawksSetup
- Jae MordantDamage
- BR-1Control / Frontline
- Luco BroncSupport / Flex
Strength: Covers 9 of 9 tracked capabilities: Ranged Pressure, Close Combat, Mobility, Control, Support, Sustain, Overwatch, Anti-Droid, Area Damage.
Weakness: Nothing is uncovered, but Sustain rests on BR-1 alone and Anti-Droid rests on Luco Bronc alone. That is the slot an injury or a substitution would cost you.
Best for: Mixed objectives and first runs through an unknown mission.
Alternative operators
- Setup → Cly Kullervo
- Damage → Kabb Uppercut
- Control / Frontline → Tel-Rea
- Support / Flex → Trick
Maximum Damage
End fights faster and accept less safety.
- HawksSetup
- Jae MordantDamage
- Cly KullervoControl / Frontline
- TrickSupport / Flex
Strength: Covers 7 of 9 tracked capabilities: Ranged Pressure, Close Combat, Mobility, Control, Support, Overwatch, Area Damage.
Weakness: Left uncovered: Sustain, Anti-Droid.
Best for: Missions with a short timer or a kill objective.
Alternative operators
- Setup → Kabb Uppercut
- Damage → Tel-Rea
- Control / Frontline → Luco Bronc
- Support / Flex → Trick
Survival
Keep the squad standing through long fights.
- HawksSetup
- Jae MordantDamage
- Kabb UppercutControl / Frontline
- BR-1Support / Flex
Strength: Covers 8 of 9 tracked capabilities: Ranged Pressure, Close Combat, Mobility, Control, Support, Sustain, Overwatch, Area Damage.
Weakness: Left uncovered: Anti-Droid, Long-range weapon profile.
Best for: Long operations, escort objectives and any run where an injury would hurt the campaign.
Alternative operators
- Setup → Cly Kullervo
- Damage → Tel-Rea
- Control / Frontline → Luco Bronc
- Support / Flex → BR-1
Advantage
Generate Advantage, then spend it on one heavy attack.
- HawksSetup
- Jae MordantDamage
- Cly KullervoControl / Frontline
- TrickSupport / Flex
⚠ Same four names as Maximum Damage; the difference is the priority list, not the roster.
Strength: Covers 7 of 9 tracked capabilities: Ranged Pressure, Close Combat, Mobility, Control, Support, Overwatch, Area Damage.
Weakness: Left uncovered: Sustain, Anti-Droid.
Best for: Missions with one high-value target or a boss-style fight.
Alternative operators
- Setup → Kabb Uppercut
- Damage → Tel-Rea
- Control / Frontline → Luco Bronc
- Support / Flex → Trick
Control
Move, stall and deny the enemy instead of out-damaging them.
- HawksSetup
- Jae MordantDamage
- Cly KullervoControl / Frontline
- Kabb UppercutSupport / Flex
Strength: Covers 7 of 9 tracked capabilities: Ranged Pressure, Close Combat, Mobility, Control, Support, Overwatch, Area Damage.
Weakness: Left uncovered: Sustain, Anti-Droid.
Best for: Defensive objectives, chokepoints and missions where you choose the engagement.
Alternative operators
- Setup → Tel-Rea
- Damage → Trick
- Control / Frontline → Luco Bronc
- Support / Flex → BR-1
Ranged
Win the fight before it closes to melee range.
- HawksSetup
- Jae MordantDamage
- Kabb UppercutControl / Frontline
- Luco BroncSupport / Flex
Strength: Covers 8 of 9 tracked capabilities: Ranged Pressure, Close Combat, Mobility, Control, Support, Overwatch, Anti-Droid, Area Damage.
Weakness: Left uncovered: Sustain.
Best for: Open maps, droid-heavy fights and objective defence.
Alternative operators
- Setup → Cly Kullervo
- Damage → Trick
- Control / Frontline → Tel-Rea
- Support / Flex → Luco Bronc
Aggressive
Reach the objective first and keep the pressure on.
- HawksSetup
- Jae MordantDamage
- Cly KullervoControl / Frontline
- Tel-ReaSupport / Flex
Strength: Covers 7 of 9 tracked capabilities: Ranged Pressure, Close Combat, Mobility, Control, Support, Overwatch, Area Damage.
Weakness: Left uncovered: Sustain, Anti-Droid.
Best for: Short missions, extraction objectives and fights you can start on your own terms.
Alternative operators
- Setup → Kabb Uppercut
- Damage → Trick
- Control / Frontline → Luco Bronc
- Support / Flex → BR-1
06
Build around an operator: who should I bring with Hawks?
Pick the operator you want to keep. The three teammates below are chosen to cover what that operator does not, and the alternatives show what each substitute keeps and adds.
Captain
Current strengths
- ✓ Ranged Pressure (from weapon profile)
- ✓ Close Combat (from weapon profile + abilities)
- ✓ Mobility (from abilities)
- ✓ Control (from abilities)
- ✓ Support (from abilities + role)
- ✓ Overwatch (from weapon overwatch range)
- ✓ Area Damage (from abilities)
What the remaining squad should cover
- ○ Sustain
- ○ Anti-Droid
Verified Bond links: Trick · Tel-Rea · Kabb Uppercut · Luco Bronc · Jae Mordant · Cly Kullervo
Recommended teammates
- 1. BR-1
Adds Sustain — the rest of this squad does not cover it.
- 2. Luco Bronc
Adds Anti-Droid — the rest of this squad does not cover it.
- 3. Trick
Adds no new tracked capability, but keeps a verified Bond link with Hawks and Luco Bronc.
Alternative
- Jae Mordant: Shares 7 of Hawks's tracked capabilities and covers the same jobs from a different angle.
- Kabb Uppercut: Shares 5 of Hawks's tracked capabilities and covers the same jobs from a different angle.
What this four covers
- ✓ Ranged Pressure3 of 4
- ✓ Close Combat1 of 4
- ✓ Mobility2 of 4
- ✓ Control1 of 4
- ✓ Support2 of 4
- ✓ Sustain1 of 4
- ✓ Overwatch3 of 4
- ✓ Anti-Droid1 of 4
- ✓ Area Damage2 of 4
07
Best squad bonds
Pair-specific Cross Training is only ever listed where the data maps it to a specific operator pair. No pair in the current data set resolves that mapping, so this guide never counts a catalogue record as an active squad bonus.
Hawks↔Jae Mordant6 sources
Hawks ↔ Jae Mordant appears in 8 of the 8 recommended templates: Advantage, Aggressive, Balanced, Control, Maximum Damage, Ranged, Safe for Permadeath, Survival.
Hawks↔Kabb Uppercut16 sources
Hawks ↔ Kabb Uppercut appears in 4 of the 8 recommended templates: Control, Ranged, Safe for Permadeath, Survival.
Hawks↔Cly Kullervo6 sources
Hawks ↔ Cly Kullervo appears in 4 of the 8 recommended templates: Advantage, Aggressive, Control, Maximum Damage.
Hawks↔Trick24 sources
Hawks ↔ Trick appears in 2 of the 8 recommended templates: Advantage, Maximum Damage.
Hawks↔Luco Bronc16 sources
Hawks ↔ Luco Bronc appears in 2 of the 8 recommended templates: Balanced, Ranged.
Hawks↔Tel-Rea20 sources
Hawks ↔ Tel-Rea appears in 1 of the 8 recommended templates: Aggressive.
When should you break up your core squad?
A Bond is long-term value. A mission objective, a required operator or an injury can all outweigh it, and none of them ask permission first.
- Required OperatorA story or objective mission can lock an operator into the squad, which changes the other three slots.
- Injury / MedbayAn injured operator takes every capability they were the only source of out of the squad with them.
- Enemy typeDroid-heavy fights reward anti-droid tools that a Bond-driven composition may not carry.
- Mission objectiveA timer or an escort objective changes which capabilities are worth a slot more than a Bond link does.
- Missing roleIf nothing in the squad covers recovery or long range, that gap costs more than one Bond link gains.
- Campaign availabilityAn operator who is unavailable for the operation cannot be in the composition, whatever the Bond says.
08
Cross training that fixes squad weaknesses
Cross Training is a pair reward with its own verified effect table. Use it to close a gap the composition already has — not to stack more of the job the squad is already good at.
The Balanced composition covers every tracked job, so there is no gap for Cross Training to close here. Pick another goal above to see the mapping, or spend Cross Training on the job this squad is already good at and accept the overlap.
Cross Training is a pair reward: it is listed here as a mapping from a missing job to a verified effect record, not as a recommendation to stack more of what the squad already has.
09
Fill squad gaps with utilities
The current data resolves 79 utility items across 34 families. This section only answers one question: which family's verified effect text addresses the job your composition is missing. The effect text is printed with every suggestion so you can judge it yourself.
The Balanced composition leaves no tracked gap, so no utility family is mapped here. Switch to a goal with a thinner slot to see which families its effect text touches.
10
Does your squad cover every range?
Range coverage comes from each operator's weapon profile, so it moves when you change a build. Four ranged operators is not the same as four operators who cover four distances.
Balanced · range spread
- Close0 of 4
- Mid2 of 4
- Long1 of 4
Long range is covered by 1 operator(s) in this composition.
Weapon per slot
- HawksDC-15A · Blaster Riflemid
- Jae MordantRelby-v10 · Blaster Riflemid
- BR-1No equipped weapon · No equipped weapon—
- Luco BroncIQA-11 · Longarm Blasterlong
11
Best squad for higher difficulty
Higher difficulty does not add capabilities to cover. It changes how much a single uncovered job costs you.
Expert
What matters more
- • Consistency over peak damage: a plan that cannot be repeated is fragile.
- • Injury control: recovery coverage matters more when a bad turn can send someone to the Medbay.
- • Overlapping coverage: two operators covering one job survive a loss better than one does.
- • Fewer single points of failure: if one operator is the only source of a capability, that is the risk.
Recommended composition
- HawksSetupDC-15A
- Jae MordantDamageRelby-v10
- Kabb UppercutControl / FrontlineEE-3
- BR-1Support / FlexNo resolved weapon kit
Covers 8 of 9 tracked capabilities: Ranged Pressure, Close Combat, Mobility, Control, Support, Sustain, Overwatch, Area Damage.
⚠ Left uncovered: Anti-Droid, Long-range weapon profile.
Load in Squad Builder →Beskar / permadeath-style runs
What matters more
- • Exposure is the real cost, so the safest composition fights from range and lets the enemy come to it.
- • A recovery answer stops being optional when a loss is permanent.
- • Mission requirements can force an operator you did not plan for, so keep a substitute per job.
- • Bond progress is worth less than an operator still being alive to use it.
Recommended composition
- HawksSetupDC-15A
- Jae MordantDamageRelby-v10
- Kabb UppercutControl / FrontlineEE-3
- BR-1Support / FlexNo resolved weapon kit
Covers 8 of 9 tracked capabilities: Ranged Pressure, Close Combat, Mobility, Control, Support, Sustain, Overwatch, Area Damage.
⚠ Left uncovered: Anti-Droid, Long-range weapon profile.
Load in Squad Builder →12
If one operator is injured
An injury removes the operator and every capability they were the only source of. The replacement has to restore those jobs, not just fill the portrait.
Hawks
Captain
What Hawks normally covers
- • Ranged Pressure (from weapon profile)
- • Close Combat (from weapon profile + abilities)
- • Mobility (from abilities)
- • Control (from abilities)
- • Support (from abilities + role)
- • Overwatch (from weapon overwatch range)
- • Area Damage (from abilities)
Appears in these recommended templates: Balanced, Maximum Damage, Survival, Advantage, Control, Ranged, Aggressive, Safe for Permadeath.
- Every job Hawks covers is also covered by another operator in the recommended templates.
- The composition survives the swap; what changes is the backup plan, not the covered list.
Best replacements
- 1. Jae Mordant
Keeps all 7 tracked readings Hawks was bringing.
- 2. Kabb Uppercut
Keeps 5 of 7 tracked readings and adds nothing new. Leaves Close Combat, Area Damage to someone else.
- 3. Cly Kullervo
Keeps 5 of 7 tracked readings and adds nothing new. Leaves Support, Area Damage to someone else.
13
Mission requirements can change your best squad
Mission requirements override any composition on this page. When an operation locks an operator into the squad, the remaining slots have to cover the jobs that operator was going to bring.
- 01Required OperatorThe operation fixes one squad slot for you.
- 02Remaining slotsThe other 3 slots are yours to fill.
- 03Missing role detectionCompare the remaining three against the capabilities the locked operator was covering.
- 04Recommended replacementsPrefer an operator who restores the missing job over one who duplicates a covered one.
Remaining slots with Hawks locked in
- BR-1Adds Sustain — the rest of this squad does not cover it.
- Luco BroncAdds Anti-Droid — the rest of this squad does not cover it.
- TrickAdds no new tracked capability, but keeps a verified Bond link with Hawks and Luco Bronc.
Close Combat, Control are covered by Hawks only in this four, so the required operator is not a free slot.
This four leaves no tracked job uncovered.
Need a team for a specific mission? Search missions →14
Build your own squad
Every composition on this page opens in the Squad Builder with its four operators already in place. Replace anyone and the coverage, Bonds and range readings update against the same schema.
15
Frequently asked questions
- What is the best squad in Zero Company?
- There is no single answer, and this guide does not pretend there is. It derives one composition per goal — balanced, damage, survival, Advantage, control, ranged, aggressive and permadeath — from the same capability readings the Squad Builder uses. Pick the goal that matches your mission and read why those four operators cover it.
- What is the best early game squad?
- The early-game section covers the jobs you cannot skip before the squad has many operators and specialization options, and it names the capability that falls out of the squad first.
- What is the best late game squad?
- The late-game section answers the opposite question: with full ability kits and developed Bonds, which job is still worth covering so the composition never has a single point of failure.
- Who should I use with Hawks?
- Open Build Around an Operator, choose Hawks and read the three teammates. Each one is listed with the capability it adds that the rest of that squad does not cover.
- Who should I use with Cly?
- Build Around an Operator answers this for every operator in the roster, Cly Kullervo included. Recommended teammates come from coverage, and the alternatives list what each substitute keeps and adds.
- Who should I use with Tel-Rea?
- Tel-Rea brings close-range Force tools instead of ranged pressure, so the derived squad around Tel-Rea is built to add ranged and recovery coverage. See the Tel-Rea entry under Build Around an Operator.
- Do Bonds matter when building a squad?
- Bonds are long-term value and every recommended composition shows its verified Bond links, but a Bond is not the first filter. A squad that covers the mission jobs without a Bond link still works; a Bond link that leaves a job uncovered does not.
- Should every squad have a Medic?
- The Medic specialization exists in the data with 7 recorded abilities, but 0 of 8 operators list it in their starting kit — so sustain has to be added deliberately rather than assumed.
- Do I need a tank?
- The data used here has no "tank" role. What this guide tracks is which capabilities a composition covers — close-range pressure, control, Overwatch, sustain — and which of them nothing in the squad provides. That check is more useful than a role label.
- What is the best squad for Expert difficulty?
- The higher-difficulty section lists what changes on Expert: consistency, injury control, overlapping coverage and fewer single points of failure, with a derived composition to compare against.
- What is the best squad for permadeath?
- A permadeath or Beskar-style run changes the cost of exposure, so the guide answers it with the survival composition and then lists what actually changes: which missions you accept, how much standoff you keep, and why a recovery answer stops being optional.
- Can I use the same squad for every mission?
- Mission requirements override any composition on this page. When an operation locks an operator into the squad, the remaining slots have to cover the jobs that operator was going to bring.
- What should I do if an operator is injured?
- An injury removes the operator and every capability they were the only source of. The replacement has to restore those jobs, not just fill the portrait.
- How many operators can I bring?
- The Squad Builder organises a squad as 4 operators, and every composition on this page is built and analysed at that size.
16
What should you decide next?
- Check my exact team →
Open the Squad Builder and replace any operator to see what coverage, Bonds and range change.
- Read one operator in detail →
Every operator page lists abilities, weapon profile, Bonds and a recommended build.
- Look up a Bond pair →
The Bond explorer shows the verified relationship and the choices that move it.
- See the Cross Training table →
Every Cross Training record with its verified numeric effect.